ch = chain
sc = single crochet
sl st = slip stitch
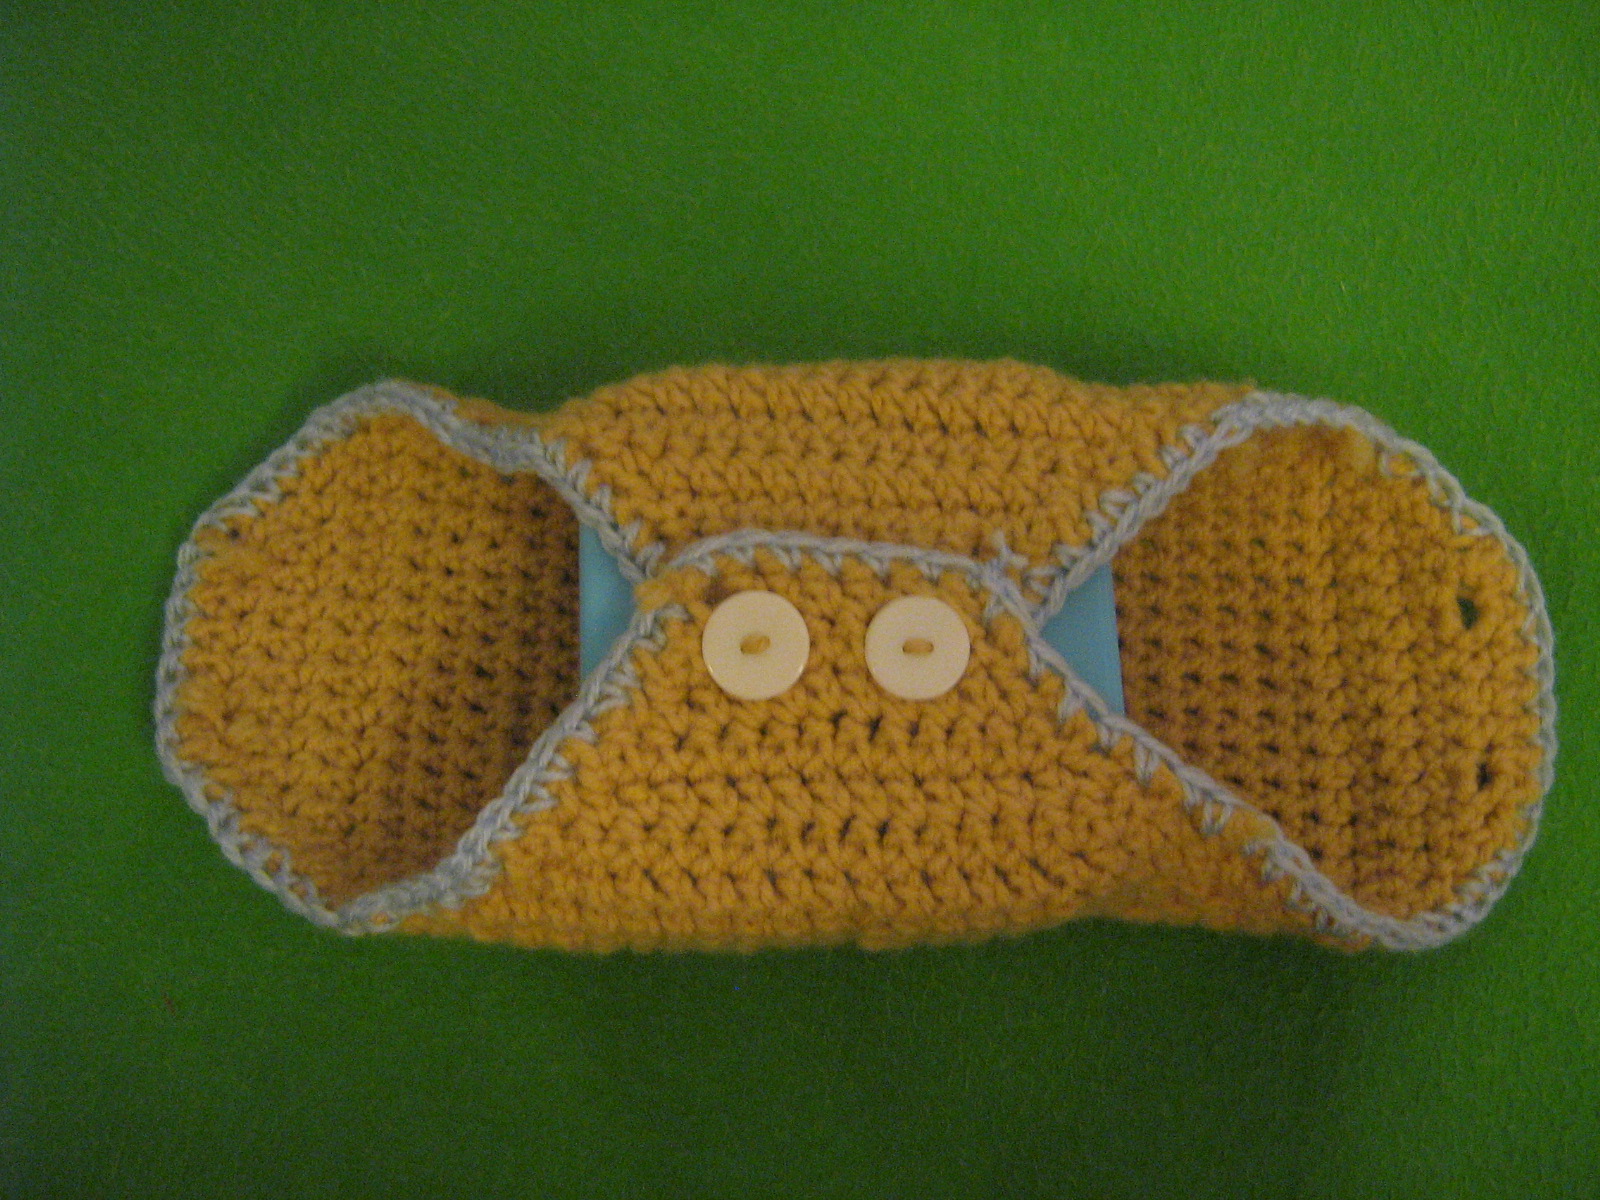
SQUARE BENTO BOX
R1: ch 4 and use a sl st to create a loop.
R1: ch 4, 2 sc in the loop,
* ch 2, 2 sc in the loop, *repeat once more,
ch 2, 1 sc in the loop,
join to beginning of row with a sl st.
R2: ch 2, sc in next st.
* sc, ch2, sc in the "corner" (where you did the ch 2)
sc in the next two stitches
repeat from * three times
EXCEPT the 3rd time,
only sc in one stitch, then join to beginning of row with a sl st.
R3 ch 2, sc in stitches up to the "corner"
* sc, ch2, sc in the "corner" (where you did the ch2)
sc in each of the next sc's, to the next corner
repeat from * all the way around, as in R2, and join your row again.
R4 on
Keep up this pattern until your square is a little bit bigger than your bento box. When you place your bento box on the mat, the sides should at least reach the top of the box, then you can move on.
WINGS
R1 make a loop on your hook like usual, then insert the hook into the first sc stitch AFTER a "corner", yo, pull through, then insert into the second sc stitch, yo, pull through. Pull your hook through the first two sts, then the next two sts on the hook to do a sc2tog at the beginning of the row WITHOUT doing a ch 2 first.
sc down the row until you have reached the second to last sc before the next "corner"
do another sc2tog, then turn
R2 Once again, do a sc2tog WITHOUT doing the usual ch 2 first. This will make a nicer curve.
sc down the row until you have reached the second to last sc before the next "corner".
turn
repeat R2 again
Keep repeating R2 until you've the wing reaches more than halfway over the middle of the top of your bento box when you place the bento box in the center of the mat.
Tie off this wing, and begin another one adjacent, but not parallel, to the first one.
To make the other two wings, find out where you might need a buttonhole on these wings and make a mental note as to which row you'll need to do them on.
TO MAKE THE BUTTONHOLE ROW
Do the sc2tog without the ch 2
sc in the next st.
Ch 1, and do not do a sc in the 4th stitch (pass it over)
Continue down the row normally starting with st 5, until you have 4 stitches left.
Ch 1, sc, then sc2tog.
Tie off.
Add buttons in the appropriate place with whatever method suits you, then tie up loose ends however you like. I used a contrasting color to do a slip stitch boarder on mine, but it isn't necessary.
Have fun!


No comments:
Post a Comment